Wednesday, November 6, 2013

DIY  WOODEN BED and HEADBOARD

As my girls got older, they outgrew their twin-size beds, and it was time for "big girl" beds.   One of my daughters had a small wooden bed that I decided to take apart and repurpose the wood in the construction of a full-size bed.  It's amazing what you can salvage when you take a piece of furniture apart.  After a trip to the lumber yard and the addition of some new wood, this was the result...


The base was constructed mainly of 3/4" sheets of plywood and 2x4's.  For the legs, 4x4's were used, and decorative wood was wrapped around the base.  I absolutely love the look of all the knots and natural grain of the wood.

 s

The headboard was built directly into the wall.  After the studs were located and marked, sheets of 1/4" plywood were cut and secured to the studs.  I then used 2x4's for the frame and top of the headboard (shelf).  Finally, the panels were cut at different lengths and screwed to the plywood.


 Lastly, the finishing touches, the stain and polyurethane, were applied.


Another project knocked off the list!

Saturday, November 2, 2013

OUR CORNER KITCHEN CABINET (repurposing the ends of my vintage soda crates)


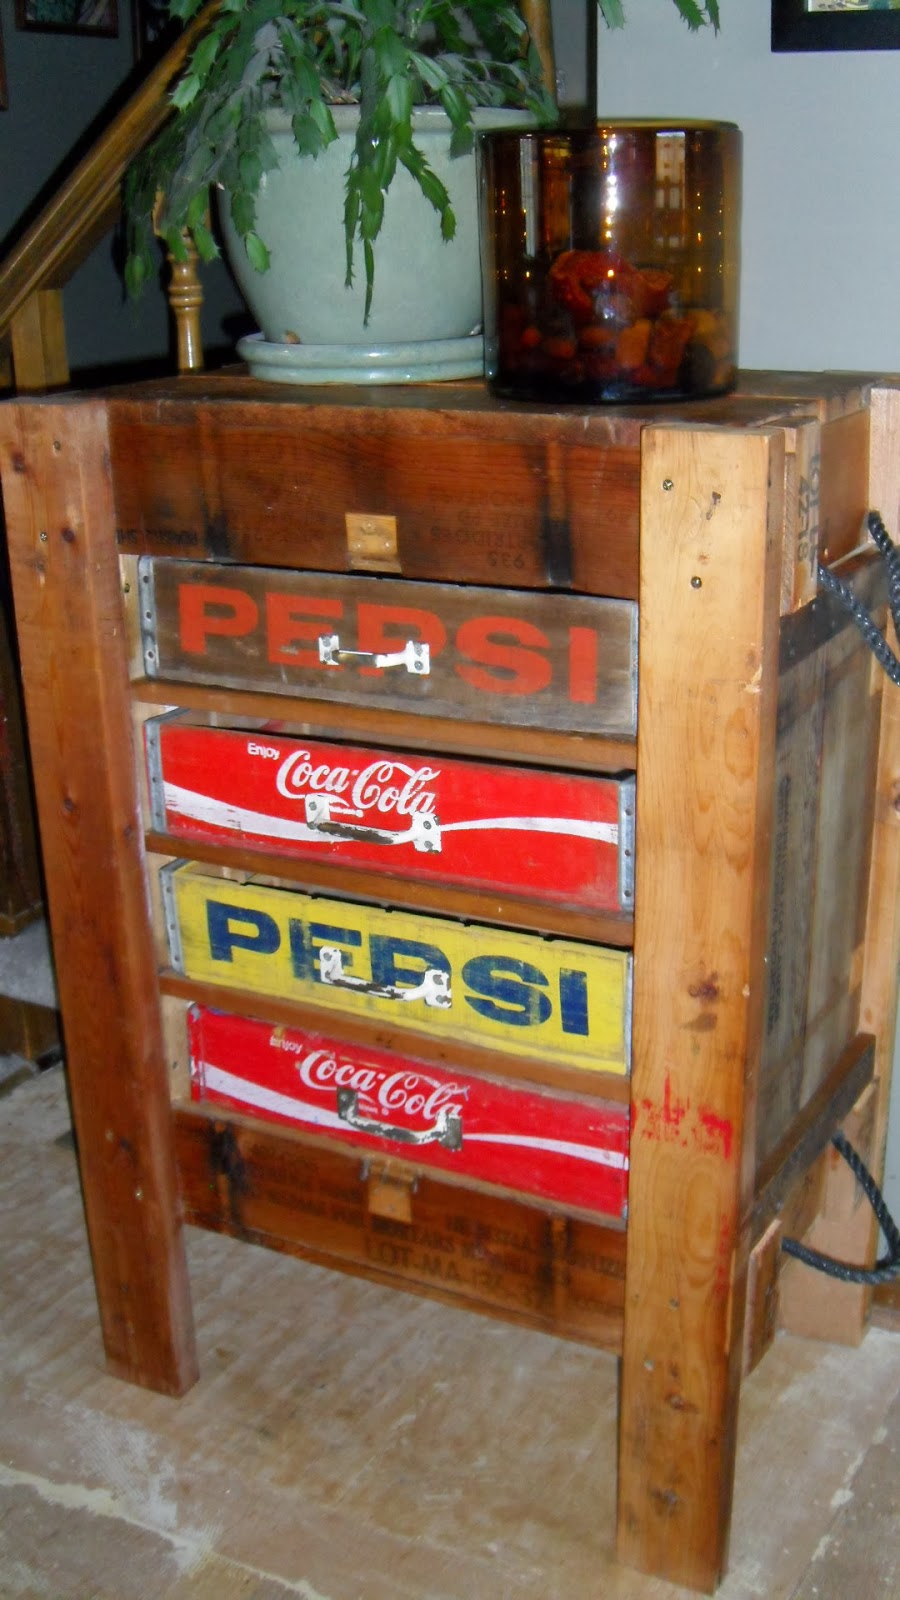
I couldn't let the ends of the soda crates from the pantry I built go to waste (see my blog entitled, "Vintage Soda Crates Repurposed"), so I used them to build one of the doors for my corner kitchen cabinet. The door was built the same as the one I built for the pantry beside my refrigerator, with the exception of adding sheet metal behind the exposed holes where the handles of the crates were. 

When designing our kitchen, I always envisioned the corner cabinetry to be functional and not just wasted space. Before our renovation, our kitchen cabinets in the corner were deep, dark, and it always seemed like such a hassle to get anything out. I ended up using them to store things that we rarely used... just because they weren't very handy.   I wanted to build my corner cabinet at a 45-degree angle that was easily accessible and would essentially close off the space that was wasted and unreachable in the corner, displaying our microwave, beverage cooler and a cookbook shelf.  My goal was for everything to be easy to reach and right there where it could be grabbed in a hurry. Underneath the microwave, I wanted an open space to set plates being put in and taken out of the microwave.  This is what I envisioned...


So, here is how it all began...a simple cabinet, made to measure, in the corner of my kitchen.  Electricity was run into the back panel of this cabinet, and outlets were dedicated for the microwave and the beverage cooler.  


I always say, "you can never have too many 2x4's," and this project took quite a few, to say the least!  I built my "functional and accessible" corner cabinet and went from there...

Next I built cabinets on either side to incorporate kitchen appliances that are less frequently used such as casserole dishes, tupperware, plastic drink bottles, dog food, etc.  My intention was to be able to store many of the things you don't want sitting out on your kitchen counters and to free up other cabinet space.  


To give you an idea of the perspective of our kitchen... We removed half a wall on one end of our kitchen.  Behind this wall was a pantry that was accessed from our hallway, which was located around the corner from our kitchen.  It was always a pain in the butt to unload groceries because of where the door was located.  It was a long and narrow pantry, and you felt claustrophobic every time you entered it. By removing this wall, the pantry is now much more open and accessible.

Every object now has a home. Instead of having to dig to the back of a cabinet to find something, everything is right there, easy to find...


The stain and polyurethane were added.


I found some vintage (reproduction) tin signs on Ebay which were used for my other door.  I used metal strips in between each sign and the same piano hinges and hardware which was used on my first pantry.


A backsplash was added underneath the microwave shelf, as well as under-cabinet lighting.  Here are some more pics of my completed project...


Storage and organization are a must around here, so I feel like my mission has been accomplished.  :)


This picture will give you an idea of the perspective of our kitchen, with the pantry around the corner from our refrigerator.


My old soda crate ends are now on permanent display!


Thank you for taking the time to visit my blog!

Sunday, October 27, 2013

MY ORIGINAL SODA CRATE PROJECT...


This was my first soda crate project, the inspiration for the pantry I built which was featured in my first blog entry.  I used two vintage ammunition boxes for the sides, bottom and top.  I left the rope handles that were attached to the sides of the ammo boxes intact and felt they added a bit of character to this piece...


2x4's were used for the legs, and I used four vintage soda crates for the drawers.  I now use this piece in my kitchen to store several sets of placemats...


The drawer handles came from vintage windows.  I kept the original paint, just sanded them down lightly to give a more rustic, worn look.


I used linseed oil to preserve this piece and bring out the color of the wood.  Now, rather than just sitting around on the floor somewhere, my old soda crates are actually functional and better displayed.  Once again, here is my finished project...


HAVE A GREAT DAY!  And thank you for taking the time to visit my blog!


Thursday, May 3, 2012

VINTAGE SODA CRATES REPURPOSED

(A tutorial on making a kitchen pantry out of old soda crates)


Okay...this is my very first blog post EVER, so please bear with me because I don't really know what I'm doing.  My idea for this pantry evolved from an earlier project, a piece of furniture I created using vintage soda crates and a couple of old ammo crates.  My husband and I are in the process of remodeling our kitchen and I couldn't find a pantry the size I wanted, so...I decided to build one to meet my specifications!


I love antiques and incorporating them into everyday living.  I will admit that there are a lot of vintage items that need to be "reclaimed" ---returned to a suitable condition for use.  This pantry incorporates a door made from approximately eight salvaged soda crates, in various conditions, carefully taken apart and given new life in my kitchen.

The beginning...


I wanted to build my pantry into the corner of my kitchen, with my refrigerator eventually sitting right next to it, so I start by building a toe kick on the floor using 2x4's.  Our chihuahua Lupe, of course, thought he needed to be in the picture, so you also see his little booty.  A base shelf was added, then the framing was attached directly to the walls after locating studs to secure the 2x4's.


Solid plywood panels were added for a side wall and the back of the pantry...  


Next the left side of the pantry was framed out, adding a center stud for stability and a place to secure the inner side panel and the exterior wooden panel...


A 2x4 brace was added across the top, and the top of the cabinet was cut to size and put in place...


At this point, my husband crawled inside and said my new construction would make a perfect tornado shelter ---for him, lol.  After adding the interior left side panel, the outer paneling was added, finishing off the exterior of the pantry...


Shelving was added, customized to fit the items to be stored...


No longer a tornado shelter and now for the fun part, working on the soda crate door...  After hitting all of the antique stores in and out of town, we came up with a good collection of soda (and water) crates.  The cost of each crate ranged from $12.00 to $25.00, and we actually found an Excelsior Springs water crate (my favorite find!) in Kansas City and brought it back to our hometown...


After carefully removing the fronts of the soda crates, they were laid out, measured and cut to fit the front of the pantry...


A frame was built, and the soda crate fronts were glued onto 3/4" plywood with Liquid Nails...  One of my crates was about an inch short, so I centered it and added 1/2-inch spacers to fill in the gaps.  Those spacers will be covered in one of the next steps...


Next two metal strips were cut to length on the sides.  After pre-drilling holes, small silver wood screws were used to secure the metal to the sides of the crates, attempting to keep original look of the metal strapping on the crates.  A very light coat of polyurethane was then applied to the fronts of the soda crates.


After sanding the frame, the back and frame of the door were stained...


...the pantry was stained, and a light coat of polyurethane was applied to the door and the pantry.


Four magnetic hinges were spaced out along the inside frame, and metal plates were applied to the back of the door.  These worked great and gave the door a very secure closure...


Lastly, a handle was added.  I chose a stainless steel handle to go with the appliances we had already purchased and the metal strips on the front of the door.


This project is now complete, and I'm ready to move on to the next one!